![]()
Taggle IoT Corella + Raspberry Pi
- What we're trying to achieve
- What you'll need
- Getting the Raspberry Pi working
- Wiring up the Corella and Atmospheric Sensors
- Installing the Sensor software from Adafruit
- Installing the Taggle Corella software
- Viewing the MQTT data feed
- Decoding and displaying your data
- About Taggle Systems
What we're trying to achieve
- Set up a basic, standalone, Temperature/Humidity monitor using a RaspberryPi single board computer.
- Connect a LPWA (Low Power Wide Area) radio transmitter to send the data via the Taggle Network.
- View the real-time data feed through the Taggle Corella Portal.
- Tap into the Taggle MQTT feed using javascript websockets.
- Display the current Temperature/Humidity on a web page, along with historical graphs.
This document walks you through the steps required to get this all running, but we'll also point out how you can extrapolate -- to set up different sensors, multiple data sources, compress data, and how to encode/decode using Python and Javascript.
Taggle Systems provides the Corella as a great starting point for developing IoT solutions.
What you'll need
You'll need a PC connected to the internet. Or a linux box. Or better still, a mac.
It would be handy if you're familiar with Linux on the command line, and with the basics of Python.
And for the front-end reporting, there's a little bit of javascript to deal with.
But I'm sure you can follow the instructions here, step by step - and if nothing
peculiar goes wrong, you'll be up and running in a very short time.
In the meantime, gather these bits of hardware...

Taggle Corella LPWA transmitter
- Refer to the specifications for the Rev_A model (which we are using for this project).
- Connect a 2dBi ½ wave dipole antenna as shown.
- Your transmitter MUST be within range of a Taggle LPWAN BaseStation to send data, but it can be offline while we set everything up initially.
Raspberry Pi
- I'm using a Raspberry Pi 3 Model B Rev 1.2 from Element14
- The Raspberry Pi 3 is powered by a +5.1V micro USB supply.
You can plug the RPi into any powered USB port on your computer, or you can buy a 2.5Amp power supply. - We're going to do a headless install of the RPi and software, so you won't need a monitor or keyboard or mouse, but you'll need an ethernet cable.
SD card (min 8GB Class 4 recommended)
- I'm using an 8GB Class 10 microSDHC XC4983 from Jaycar
Atmospheric Sensors
- I'm using a DHT11 Temperature and Humidity Sensor Module XC4520 from Jaycar
If your Corella came without header pins
- You can solder your components or jumper wires direct to the Corella.
- Or you can solder your own header pins, and continue...
If your Corella has header pins
- You'll need
- Arduino Compatible Xbee Interface Shield XC4608 from Jaycar
- Arduino Compatible Mini Breadboard with 170 Tie Points PB8817 from Jaycar
- A set of 150mm Plug to Socket Jumper Leads WC6028 from Jaycar
Getting the Raspberry Pi working
If you already have an RPi set up, and you can connect via ssh or you've got a monitor, mouse, and keyboard - all well and good. You can skip this section, but make sure to check the bit about freeing up GPIOs 14 and 15, and disabling the system service that initialises the modem.
Download RASPBIAN

I chose RASPBIAN STRETCH WITH DESKTOP
Create the SD card
Etcher is a graphical SD card writing tool that works on Mac OS, Linux and Windows, and is the easiest option for most users.
- Download Etcher and install it.
https://www.balena.io/etcher/
I used Version 1.4.3 - Connect an SD card reader with the SD card inside.
- Open Etcher and select from your hard drive the Raspberry Pi .img or .zip file you wish to write to the SD card.
- Select the SD card you wish to write your image to.
- Review your selections and click 'Flash!' to begin writing data to the SD card.

As a rough indicator, this took me about 15 minutes on a 2015 iMac running macOS High Sierra version 10.13.4 (17E199) with 24GB RAM.
Enable SSH
![]() Place a file named “ssh” (without any extension) onto the boot partition of the SD card.
Place a file named “ssh” (without any extension) onto the boot partition of the SD card.
Connect UART0/ttyAMA0 to GPIOs 14 and 15.
By default the bluetooth module uses this port, so the simplest way is to disable bluetooth
https://www.raspberrypi.org/documentation/configuration/uart.md

Use the overlay
pi3-disable-bt
![]() Edit config.txt to add this line :
Edit config.txt to add this line :
Plug It In
Once the Raspberry Pi has booted, there are 2 ways to connect to it from your PC/laptop
$ ssh pi@raspberrypi.local
If this does not work, you need to find the IP address of the Raspberry Pi
(in this example, we're on network 10.1.1. and the router is 10.1.1.1
-- you might find yourself with a LAN IP of 192.168.1.xxx, so modify this to suit.
Download NMAP here)
$ sudo nmap -sn 10.1.1.1/24 | grep -i raspberry -B 2
$ ssh pi@10.1.1.xxx
username: pi
password: raspberry
$ ssh pi@raspberrypi.local
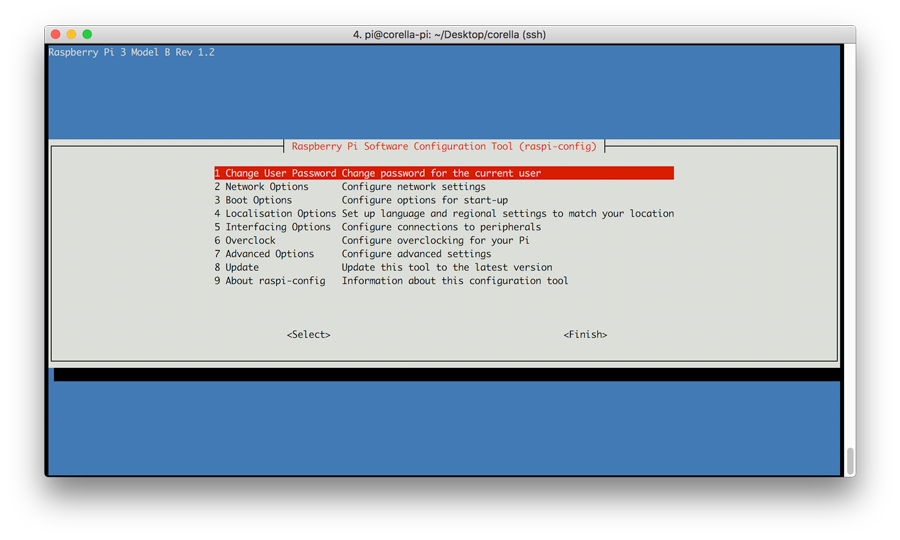
Setup and Configuration
https://www.raspberrypi.org/documentation/configuration/raspi-config.md
$ sudo raspi-config
Reboot (this is the default action after raspi-config)
$ sudo reboot now
Once it has rebooted (this only takes a minute), reconnect using the new hostname.
$ ssh pi@corella-pi.local
Disable the system service that initialises the modem
$ sudo systemctl disable hciuart
Removed /etc/systemd/system/multi-user.target.wants/hciuart.service.
Now your RPi is configured and ready to rumble.
Wiring up the Corella and Atmospheric Sensors
 Connect the Corella power.
◉ 3.3v connects to RPi pin #01
◉ GND connects to RPi pin #09

 Connect the UART as shown.
(GPIO 14/15)
◉ Corella DOUT connects to RPi pin #08
◉ Corella DIN connects to RPi pin #10
 Connect the DHT11 sensor as shown.
◉ 5v connects to RPi pin #04
◉ GND connects to RPi pin #06
◉ S (data) connects to RPi pin #16

Installing the Sensor software from Adafruit
$ mkdir ~/Desktop/corella

$ cd ~/Desktop/corella

$ sudo apt-get install git-core
Reading package lists... Done
Building dependency tree
Reading state information... Done
The following NEW packages will be installed:
  git-core
0 upgraded, 1 newly installed, 0 to remove and 0 not upgraded.
Need to get 1,410 B of archives.
After this operation, 8,192 B of additional disk space will be used.
Get:1 http://raspbian.raspberrypi.org/raspbian stretch/main armhf git-core all 1:2.11.0-3+deb9u2 [1,410 B]
Fetched 1,410 B in 1s (925 B/s)
Selecting previously unselected package git-core.
(Reading database ... 124722 files and directories currently installed.)
Preparing to unpack .../git-core_1%3a2.11.0-3+deb9u2_all.deb ...
Unpacking git-core (1:2.11.0-3+deb9u2) ...
Setting up git-core (1:2.11.0-3+deb9u2) ...


$ git clone https://github.com/adafruit/Adafruit_Python_DHT.git
Cloning into 'Adafruit_Python_DHT'...
remote: Counting objects: 249, done.
remote: Total 249 (delta 0), reused 0 (delta 0), pack-reused 249
Receiving objects: 100% (249/249), 77.01 KiB | 0 bytes/s, done.
Resolving deltas: 100% (142/142), done.

$ cd Adafruit_Python_DHT/


$ sudo python3 setup.py install
running install
running bdist_egg
running egg_info
creating Adafruit_DHT.egg-info
writing top-level names to Adafruit_DHT.egg-info/top_level.txt
writing dependency_links to Adafruit_DHT.egg-info/dependency_links.txt
writing Adafruit_DHT.egg-info/PKG-INFO
writing manifest file 'Adafruit_DHT.egg-info/SOURCES.txt'
reading manifest file 'Adafruit_DHT.egg-info/SOURCES.txt'
writing manifest file 'Adafruit_DHT.egg-info/SOURCES.txt'
installing library code to build/bdist.linux-armv7l/egg
running install_lib
running build_py
creating build
creating build/lib.linux-armv7l-3.5
creating build/lib.linux-armv7l-3.5/Adafruit_DHT
copying Adafruit_DHT/platform_detect.py -> build/lib.linux-armv7l-3.5/Adafruit_DHT
copying Adafruit_DHT/Raspberry_Pi.py -> build/lib.linux-armv7l-3.5/Adafruit_DHT
copying Adafruit_DHT/Raspberry_Pi_2.py -> build/lib.linux-armv7l-3.5/Adafruit_DHT
copying Adafruit_DHT/Beaglebone_Black.py -> build/lib.linux-armv7l-3.5/Adafruit_DHT
copying Adafruit_DHT/common.py -> build/lib.linux-armv7l-3.5/Adafruit_DHT
copying Adafruit_DHT/__init__.py -> build/lib.linux-armv7l-3.5/Adafruit_DHT
copying Adafruit_DHT/Test.py -> build/lib.linux-armv7l-3.5/Adafruit_DHT
running build_ext
building 'Adafruit_DHT.Raspberry_Pi_2_Driver' extension
creating build/temp.linux-armv7l-3.5
creating build/temp.linux-armv7l-3.5/source
creating build/temp.linux-armv7l-3.5/source/Raspberry_Pi_2
arm-linux-gnueabihf-gcc -pthread -DNDEBUG -g -fwrapv -O2 -Wall -Wstrict-prototypes -g -fdebug-prefix-map=/build/python3.5-RUbMX3/python3.5-3.5.3=. -fstack-protector-strong -Wformat -Werror=format-security -Wdate-time -D_FORTIFY_SOURCE=2 -fPIC -I/usr/include/python3.5m -c source/_Raspberry_Pi_2_Driver.c -o build/temp.linux-armv7l-3.5/source/_Raspberry_Pi_2_Driver.o -std=gnu99
arm-linux-gnueabihf-gcc -pthread -DNDEBUG -g -fwrapv -O2 -Wall -Wstrict-prototypes -g -fdebug-prefix-map=/build/python3.5-RUbMX3/python3.5-3.5.3=. -fstack-protector-strong -Wformat -Werror=format-security -Wdate-time -D_FORTIFY_SOURCE=2 -fPIC -I/usr/include/python3.5m -c source/common_dht_read.c -o build/temp.linux-armv7l-3.5/source/common_dht_read.o -std=gnu99
arm-linux-gnueabihf-gcc -pthread -DNDEBUG -g -fwrapv -O2 -Wall -Wstrict-prototypes -g -fdebug-prefix-map=/build/python3.5-RUbMX3/python3.5-3.5.3=. -fstack-protector-strong -Wformat -Werror=format-security -Wdate-time -D_FORTIFY_SOURCE=2 -fPIC -I/usr/include/python3.5m -c source/Raspberry_Pi_2/pi_2_dht_read.c -o build/temp.linux-armv7l-3.5/source/Raspberry_Pi_2/pi_2_dht_read.o -std=gnu99
arm-linux-gnueabihf-gcc -pthread -DNDEBUG -g -fwrapv -O2 -Wall -Wstrict-prototypes -g -fdebug-prefix-map=/build/python3.5-RUbMX3/python3.5-3.5.3=. -fstack-protector-strong -Wformat -Werror=format-security -Wdate-time -D_FORTIFY_SOURCE=2 -fPIC -I/usr/include/python3.5m -c source/Raspberry_Pi_2/pi_2_mmio.c -o build/temp.linux-armv7l-3.5/source/Raspberry_Pi_2/pi_2_mmio.o -std=gnu99
arm-linux-gnueabihf-gcc -pthread -shared -Wl,-O1 -Wl,-Bsymbolic-functions -Wl,-z,relro -Wl,-z,relro -g -fdebug-prefix-map=/build/python3.5-RUbMX3/python3.5-3.5.3=. -fstack-protector-strong -Wformat -Werror=format-security -Wdate-time -D_FORTIFY_SOURCE=2 build/temp.linux-armv7l-3.5/source/_Raspberry_Pi_2_Driver.o build/temp.linux-armv7l-3.5/source/common_dht_read.o build/temp.linux-armv7l-3.5/source/Raspberry_Pi_2/pi_2_dht_read.o build/temp.linux-armv7l-3.5/source/Raspberry_Pi_2/pi_2_mmio.o -lrt -o build/lib.linux-armv7l-3.5/Adafruit_DHT/Raspberry_Pi_2_Driver.cpython-35m-arm-linux-gnueabihf.so
creating build/bdist.linux-armv7l
creating build/bdist.linux-armv7l/egg
creating build/bdist.linux-armv7l/egg/Adafruit_DHT
copying build/lib.linux-armv7l-3.5/Adafruit_DHT/platform_detect.py -> build/bdist.linux-armv7l/egg/Adafruit_DHT
copying build/lib.linux-armv7l-3.5/Adafruit_DHT/Raspberry_Pi.py -> build/bdist.linux-armv7l/egg/Adafruit_DHT
copying build/lib.linux-armv7l-3.5/Adafruit_DHT/Raspberry_Pi_2.py -> build/bdist.linux-armv7l/egg/Adafruit_DHT
copying build/lib.linux-armv7l-3.5/Adafruit_DHT/Beaglebone_Black.py -> build/bdist.linux-armv7l/egg/Adafruit_DHT
copying build/lib.linux-armv7l-3.5/Adafruit_DHT/Raspberry_Pi_2_Driver.cpython-35m-arm-linux-gnueabihf.so -> build/bdist.linux-armv7l/egg/Adafruit_DHT
copying build/lib.linux-armv7l-3.5/Adafruit_DHT/common.py -> build/bdist.linux-armv7l/egg/Adafruit_DHT
copying build/lib.linux-armv7l-3.5/Adafruit_DHT/__init__.py -> build/bdist.linux-armv7l/egg/Adafruit_DHT
copying build/lib.linux-armv7l-3.5/Adafruit_DHT/Test.py -> build/bdist.linux-armv7l/egg/Adafruit_DHT
byte-compiling build/bdist.linux-armv7l/egg/Adafruit_DHT/platform_detect.py to platform_detect.cpython-35.pyc
byte-compiling build/bdist.linux-armv7l/egg/Adafruit_DHT/Raspberry_Pi.py to Raspberry_Pi.cpython-35.pyc
byte-compiling build/bdist.linux-armv7l/egg/Adafruit_DHT/Raspberry_Pi_2.py to Raspberry_Pi_2.cpython-35.pyc
byte-compiling build/bdist.linux-armv7l/egg/Adafruit_DHT/Beaglebone_Black.py to Beaglebone_Black.cpython-35.pyc
byte-compiling build/bdist.linux-armv7l/egg/Adafruit_DHT/common.py to common.cpython-35.pyc
byte-compiling build/bdist.linux-armv7l/egg/Adafruit_DHT/__init__.py to __init__.cpython-35.pyc
byte-compiling build/bdist.linux-armv7l/egg/Adafruit_DHT/Test.py to Test.cpython-35.pyc
creating stub loader for Adafruit_DHT/Raspberry_Pi_2_Driver.cpython-35m-arm-linux-gnueabihf.so
byte-compiling build/bdist.linux-armv7l/egg/Adafruit_DHT/Raspberry_Pi_2_Driver.py to Raspberry_Pi_2_Driver.cpython-35.pyc
creating build/bdist.linux-armv7l/egg/EGG-INFO
copying Adafruit_DHT.egg-info/PKG-INFO -> build/bdist.linux-armv7l/egg/EGG-INFO
copying Adafruit_DHT.egg-info/SOURCES.txt -> build/bdist.linux-armv7l/egg/EGG-INFO
copying Adafruit_DHT.egg-info/dependency_links.txt -> build/bdist.linux-armv7l/egg/EGG-INFO
copying Adafruit_DHT.egg-info/top_level.txt -> build/bdist.linux-armv7l/egg/EGG-INFO
writing build/bdist.linux-armv7l/egg/EGG-INFO/native_libs.txt
zip_safe flag not set; analyzing archive contents...
Adafruit_DHT.__pycache__.Raspberry_Pi_2_Driver.cpython-35: module references __file__
creating dist
creating 'dist/Adafruit_DHT-1.3.2-py3.5-linux-armv7l.egg' and adding 'build/bdist.linux-armv7l/egg' to it
removing 'build/bdist.linux-armv7l/egg' (and everything under it)
Processing Adafruit_DHT-1.3.2-py3.5-linux-armv7l.egg
creating /usr/local/lib/python3.5/dist-packages/Adafruit_DHT-1.3.2-py3.5-linux-armv7l.egg
Extracting Adafruit_DHT-1.3.2-py3.5-linux-armv7l.egg to /usr/local/lib/python3.5/dist-packages
Adding Adafruit-DHT 1.3.2 to easy-install.pth file

Installed /usr/local/lib/python3.5/dist-packages/Adafruit_DHT-1.3.2-py3.5-linux-armv7l.egg
Processing dependencies for Adafruit-DHT==1.3.2
Finished processing dependencies for Adafruit-DHT==1.3.2
Installing the Taggle Corella software
$ cd ~/Desktop/corella
$ wget http://corella.taggle.com.au/rpi/custom_downloads/examples.tar.gz
$ tar xzvf examples.tar.gz
$ chmod +x DHT11*
$ ls -la
Confirm that it works
Check the python 3 version
$ python3 -V

Python 3.5.3
Try running the software from the command line
$ python3 /home/pi/Desktop/corella/DHT11.py
The example DHT11 python script starts by running through the basic introspection commands.
- AT(Attention) -- checks for active serial communication
- AT ID -- returns your Corella device's unique device ID
- AT VERSION -- returns the device, hardware, and software versions
- AT DIAGNOSTICS -- reports the device's internal diagnostics
- AT LEDS=OFF -- set to low power mode (turn off the Corellas status LEDs)
- AT LEDS=ON -- set to normal power mode (turn on the Corellas status LEDs)
Then it begins a cycle of reporting the Temp/Humidity from the DHT11 sensor.
Here's what you should expect to see...
First time you run this from the command line, you will most likely get an error - if that happens, just stop and rerun (once it's under cron these will be taken care of).
Add a cron job to start and keep alive
$ crontab -e
Add this line to the crontab (you can copy it from corella-cron.txt that you just downloaded)
Within a minute, you should see the keepalive log created from the cron job. You can monitor this to see that the process is working correctly.
$ tail -f DHT11-keepalive.log
To stop the background script running, first comment out the cronjob
$ crontab -e
Then stop the currently running process -- you'll find the PID in the DHT11-keepalive.log
$ kill -9 2824
Power off ?
By having the python keepalive in cron, you can switch off your RPi, and it will start running again as soon as the RPi reboots. Just plug it into battery/power and it will start transmitting - no need for a monitor or keyboard!
No local internet ?
No problems. The Corella broadcasts via LPWA radio to the Taggle network, not via the internet.
Now that it's all set up, you can disconnect your RPi from ethernet.
As long as your Corella device is within range of a Taggle basestation, your data will be sent, and you can monitor it via the Corella Portal, or via MQTT with a dedicated /corella/ topic.
Viewing the MQTT data feed
Sign in to the Corella Data Portal.

The raw messages are seen in near-real time.
The packet_type and payload parameters can be seen in the JSON data.

Decoding and displaying your data
The data payloads that your Corella is sending are originally (in these examples) written as plain-text ASCII.
However, they are encoded to HEX for transmission.
The Corella Portal displays this raw HEX as the payoad (which technically it is), so it's up to you to decode the information
- which will be the "inverse" of how you encoded it in the first place.
Which means that the most obvious decoding, and the one we'll show you first, is hex-to-ascii.
A simple front-end decoder
When you downloaded and unpacked the examples.tar.gz, you created a folder called "frontend", containing 2 files
- corella_mqtt.js
- monitor.html
corella_mqtt.js is a simple javascript(+jQuery) library that allows you to easily
- Connect to the Corella MQTT broker via secure websockets
- Subscribe to a dedicated topic for your device
- Deal with realtime data as it arrives
- Convert HEX string to ASCII string (handy)
- Save the realtime message stream to your local browser so you can view timelines as well
- Switch on/off verbose diagnostics
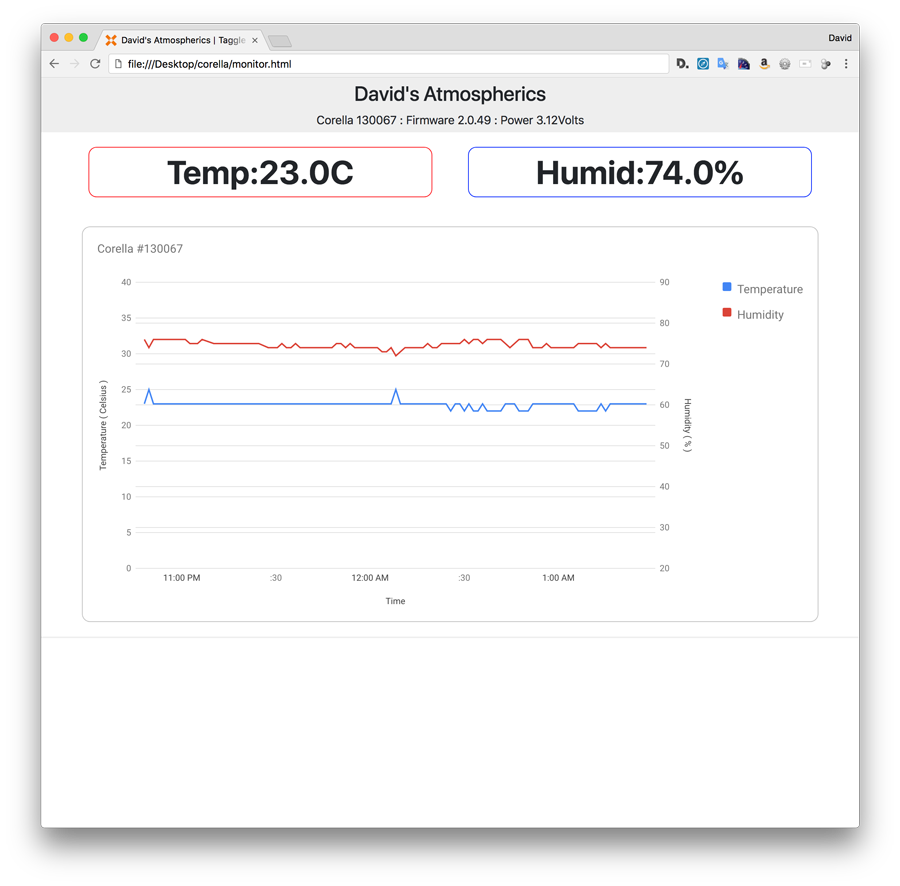
monitor.html is a standalone local HTML file that you can open in any browser.
It's specifically written to display the information that the DHT11.py script running on your RPi is sending.
It's also written to show you a few different ways to deal with the MQTT feeds - so you should play with it, make changes, and do magic.
- Create custom functions to deal with various network and data issues, based on simple examples
- Use the Google charts API for data visualization
You'll need to be connected to the internet,
but you don't need to run monitor.html from a webserver.
You'll definitely need a Corella Portal login
- where you will discover the configurations to make it run (for your device[s] only).
- Enter your connection details into the configuration
Actually, that's all you neeed do - to start with.
- Open monitor.html in your browser (drag it onto an open Chrome window for example)
Every time a new message comes in, the screen will update, and a graph will appear over time. - Use the browser's developer tools to watch the console and debugging logs.
Transmission credits
Your Corella device ships with credits for 10,000 transmissions on the Taggle IoT network.
After that, you'll need to pay to access more data -- so it's smart to do a few calculations before you leave it running.
The example code we've given you here is close to the practical limits (the Corella is throttled to transmit no more than every 10 seconds)
We're sending the same data in 3 different packets so you can see how to deal with it on the receiving end.
Which means you'll burn through your credits in 2 or 3 days.
A more practical setup would only send one packet of encoded/compressed data every 10 minutes.
Which means you'll have a lot longer - about 2 months.
But maybe that's not going to give you the immediate feedback while you're debugging and developing new projects.
You need to find the right balance for your project/budget.
If you devise a way to collate/encode/compress data, you could send a daily summary in a series of maybe 10 packets (that's about 240 Bytes).
Credits will last about 3 years.
Packet Types (a.k.a. Packet ID)
You specify a packet_type whenever you send data.
- Packet_type [0] is reserved for diagnostic messages.
- a diagnostic transmission can be triggered at any time by pressing the TX test button. - Analog packet_type [1] is interpreted by the Taggle Network as analog data
- User defined packet_types [2-9]
// ----------------------------------------------------------
// PHP Example
//   -- how to convert analog numbers to corella data packet, and decode the result
//   -- take note in this example of the rounding errors expected with IEEE-754
//      Single precision (32 bits)
//      https://en.wikipedia.org/wiki/IEEE_754
//      https://babbage.cs.qc.cuny.edu/IEEE-754/index.xhtml
// ----------------------------------------------------------

$raw_analog_data = array(
    12345678, // 0x3F9E060F
    -200.002, // 0xC3480083
    555.6666, // 0x4C94596E
);
print "\n raw_analog_data = ";
print_r($raw_analog_data);

$payload = analog_to_payload($raw_analog_data);
print "\n payload = ";
print_r($payload);

$data = payload_to_analog($payload);
print "\n data = ";
print_r($data);

// ----------------------------------------------------------

RETURNS :

raw_analog_data = Array
(
    [0] => 12345678
    [1] => -200.002
    [2] => 555.6666
)

payload = 4b3c614ec3480083440aeaaa

data = Array
(
    [0] => 12345678
    [1] => -200.00199890137
    [2] => 555.66662597656
)


// ----------------------------------------------------------
function analog_to_payload($data) {
    $payload = '';
    foreach($data as $num){
        $converted = '00000000';
        if( $num != 0 ){
            $sign = $num < 0 ? 0x300 : 0x200;
            $significant = abs($num);
            $exponent = floor(log($significant, 2));
            $significant = round($significant / pow(2, $exponent-23));
            $exponent += 127;
            $bin = substr(decbin($sign + $exponent), 1) . substr(decbin($significant), 1);
            if (strlen($bin) !== 32) { $converted = 'FFFFFFFF'; }
            $converted = str_pad(dechex(bindec($bin)), 8, "0", STR_PAD_LEFT);
        }
        $payload .= $converted;
    }
    return str_pad($payload, 24, '0');
}
// ----------------------------------------------------------
function payload_to_analog($payload) {
    $floats = array();
    foreach(array(0,8,16) as $k){
        $hx = substr($payload, $k, 8);
        if( $hx == '00000000' ){
            $floats[] = 0;
            continue;
        }
        $binx = sprintf( "%032b", hexdec($hx) );
        $sign = substr($binx, 0, 1);
        $exp = substr($binx, 1, 8);
        $mantissa = "1".substr($binx, 9);
        $mantissa = str_split($mantissa);
        $exp = bindec($exp)-127;
        $significand=0;
        for ($i = 0; $i < 24; $i++) {
            $significand += (1 / pow(2,$i))*$mantissa[$i];
        }
        $floats[] = $significand * pow(2,$exp) * ($sign*-2+1);
    }
    return $floats;
}
// ----------------------------------------------------------
// Javascript Example
//   -- how to decode a single 4-byte block of the packet (8 hex chars)
// ----------------------------------------------------------

var str = '41FC6733';

function parseFloat(str) {
  str = '0x' + str;
  var float = 0, sign, order, mantiss,exp,
      int = 0, multi = 1;
  if (/^0x/.exec(str)) {
    int = parseInt(str,16);
  }else{
    for (var i = str.length -1; i >=0; i -= 1) {
      if (str.charCodeAt(i)>255) {
        console.log('Wrong string parametr');
        return false;
      }
      int += str.charCodeAt(i) * multi;
      multi *= 256;
    }
  }
  sign = (int>>>31)?-1:1;
  exp = (int >>> 23 & 0xff) - 127;
  mantissa = ((int & 0x7fffff) + 0x800000).toString(2);
  for (i=0; i<mantissa.length; i+=1){
    float += parseInt(mantissa[i])? Math.pow(2,exp):0;
    exp--;
  }
  return float*sign;
}
Use the packet_type to differentiate between data types.
- (At the sensor end) craft a dedicated encoder script for this particular data type.
- (At the presentation end) craft a dedicated decoder script.
- Use the packet type at both ends so you can deal with other data types in parallel.
If you desperately need to deal with more than 9 data types, or you're using the packet_type for a large number of individual sensors, you could consider using the first byte of your payload to further divide them... or whatever other scheme you can think of. It's your data, so you can deal with it however you want. The Taggle network is agnostic and simply passes the payloads from end to end.
About Taggle Systems
Taggle is an Australian based and owned developer of Low Power Wide Area (LPWA) radio technology offering low-cost, low-power, long range communications for many types of sensors and devices.
With a rapidly expanding international network, we service high-rise and urban centres, regional utilities, remote communities and farm monitoring. We work with our customers to deliver tailored solutions.
The Corella project enables experimentation, innovation, small-scale or specialized projects to be implemented without fuss or large investment.